
Safer Basements. Brighter Living Spaces. Careful Installation.
Egress Window Installation in Lapeer, MI
Create a safer, more usable basement with an egress window planned around your foundation, drainage conditions, room layout, and long-term water protection. Lapeer Egress Windows helps homeowners understand the work before excavation begins and carries each installation through cutting, setting, sealing, well placement, and cleanup.
A Basement Improvement That Must Be Planned as a Complete System
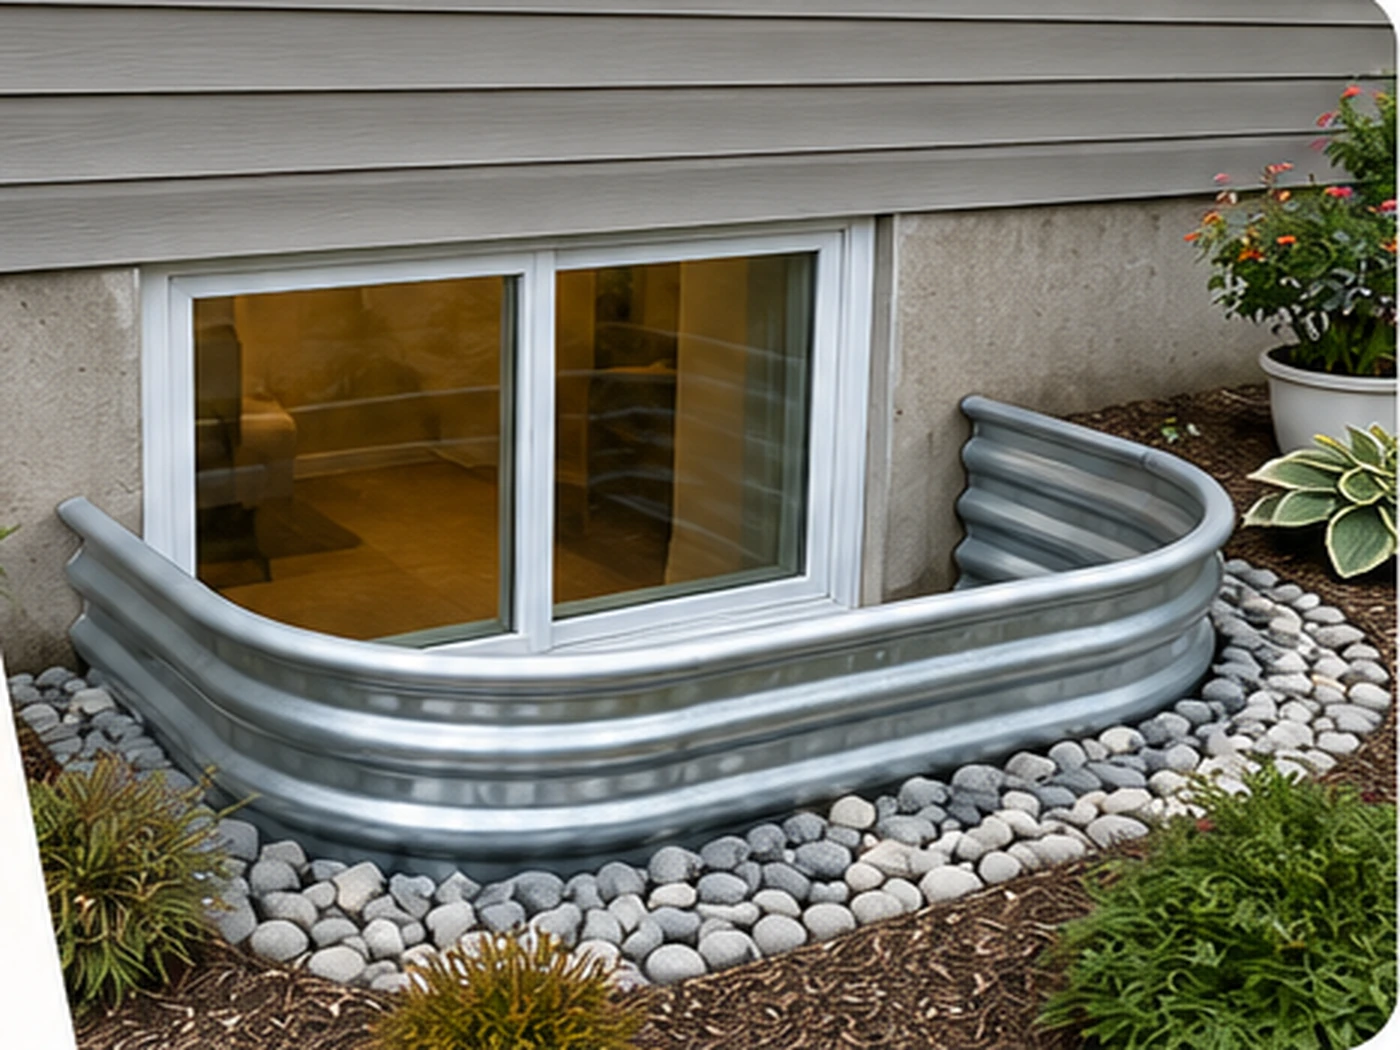
An egress window changes more than the amount of daylight in a basement. It creates a large opening in a foundation wall, introduces a below-grade window well, and adds a new point where exterior water, soil pressure, insulation, interior finishes, and emergency access all meet. A dependable installation therefore has to be treated as a complete system rather than a simple window replacement.
For homeowners in Lapeer and nearby communities, that planning matters because basement conditions vary widely. One property may have sandy soil and generous access for excavation, while another may have heavy clay, mature landscaping, a narrow side yard, or an older block foundation. The right solution depends on the house, the room being improved, and how water already moves around the property.
A well-planned project begins with the practical questions: Why is the window being added? Will the room become a bedroom? Is the basement already finished? Where are utilities located? Can the well drain safely? What foundation material must be cut? What interior and exterior repairs will be required afterward? Answering those questions early helps prevent expensive changes once the opening has been made.
Why Homeowners Add Egress Windows
Homeowners pursue egress window installation for different reasons, but the strongest projects usually combine safety, function, and long-term value.
Emergency Escape and Rescue Access
The principal purpose of an egress window is to provide a direct emergency opening from a basement living or sleeping area. When the normal stairway cannot be used, occupants need another route out. The opening must also be usable by emergency responders. That is why the usable clear opening, sill height, window operation, well dimensions, and ladder or step requirements deserve careful attention.
A More Practical Basement Layout
A larger window can make a basement office, recreation room, guest area, or future bedroom feel less enclosed. Natural light improves the way the room looks during the day, while an operable window can support ventilation when weather permits. The improvement is especially noticeable in older homes where the original basement windows are small, high, and designed only for minimal light.
Preparation for a Legal Bedroom
When a homeowner plans a basement bedroom, the egress opening should be considered before framing, electrical work, flooring, or finished wall surfaces are completed. Window placement affects the bedroom layout, bed location, closet planning, and exterior excavation. Installing the opening first protects finished materials and gives the remodeling plan a clear starting point.
Better Resale Presentation
Buyers often view a bright, accessible basement differently from a dark utility space. An egress window does not by itself guarantee that a room can be marketed as a legal bedroom, because the complete room must satisfy applicable requirements. It can, however, support a more credible and usable basement improvement when it is installed with permits, inspections, drainage, and finish details in mind.
Planning the Right Installation for the House
No two foundation walls or yards should be approached automatically. The preliminary evaluation should connect the interior goal with the exterior conditions.
Interior Location and Room Use
The window should be positioned where it serves the room without creating avoidable conflicts. Inside, the installer must consider ceiling height, planned wall framing, electrical runs, plumbing, ductwork, and the future furniture layout. Outside, the same location must be checked for decks, walkways, fences, air-conditioning equipment, downspouts, utility meters, landscaping, and lot-line limitations.
Foundation Material and Wall Condition
Poured concrete, concrete block, and older masonry walls require different preparation and cutting methods. Wall thickness, cracking, previous repairs, moisture staining, and structural conditions should be reviewed before work begins. A clean opening is important, but so is preserving the integrity of the surrounding wall. Any questionable condition should be addressed before assuming the wall can be cut in the same manner as a newer poured foundation.
Utility Location and Excavation Access
Excavation should never begin until public utility marking has been completed and the work area has been reviewed for private lines that may not be included in standard marking services. Sprinkler piping, private electrical feeds, septic components, drainage lines, and landscape lighting can all affect the excavation plan. Equipment access also influences how quickly soil can be removed and how much of the lawn or landscaping must be protected.
What a Complete Egress Window Installation Includes
A professional project is a sequence of connected tasks. Skipping or rushing one stage can affect the performance of everything that follows.
1. Site Review and Measurements
The installer evaluates the proposed location, takes interior and exterior measurements, identifies access constraints, and confirms the type of window and well being considered. The intended room use should be discussed at this stage because a bedroom project may require different planning than a daylight-only improvement.
2. Permit and Inspection Coordination
Permit requirements are handled by the local authority with jurisdiction. Requirements can differ by municipality and project scope, so homeowners should not rely on a neighbor’s experience or an online summary as a substitute for current local guidance. Plans may need to identify the opening size, window type, sill height, well dimensions, drainage approach, and structural details.
3. Excavation and Work-Area Protection
Soil is removed to expose the foundation and create enough room for cutting, waterproofing, well installation, and drainage work. Nearby siding, lawn, planting beds, hardscape, and mechanical equipment should be protected. Excavated soil must be managed so it does not collapse back into the work area or overload the edge of the excavation.
4. Foundation Layout and Cutting
The opening is laid out from verified measurements, not from the nominal size printed on the window. Specialized equipment is used to create a controlled cut. The method should limit unnecessary vibration and reduce damage to the surrounding wall. Block walls may require reinforcement or additional framing details depending on the opening and existing construction.
5. Window Setting, Fastening, and Sealing
The window is set square, level, and plumb so it operates correctly and seals consistently. Fastening must suit the window and substrate. The perimeter is insulated and sealed with compatible materials, and exterior waterproofing is tied into the surrounding wall. Interior gaps should not be concealed until the installation has been checked.
6. Window Well and Drainage Installation
The well is secured to the foundation and sized to preserve usable escape space. A drainage layer is installed at the bottom, and a drain may connect to an approved system when conditions allow. The final approach depends on footing drains, soil, groundwater, grading, and local requirements. A decorative cover can help keep leaves and debris out, but it is not a substitute for drainage.
7. Backfill, Grading, and Finish Preparation
The excavation is backfilled carefully so the well remains stable. Soil is shaped to direct surface water away from the house. Interior framing, insulation, trim, drywall repair, and exterior landscaping may be included or coordinated separately, depending on the project scope.
8. Final Review and Homeowner Orientation
The window should open without unusual force, locks should be understandable, the well should be clear of obstructions, and any ladder or steps should be secure. The homeowner should know how to clean the drain area, inspect sealant, remove debris, and keep furniture from blocking the opening.
Egress Window Code and Inspection Considerations
Egress requirements are intended to make the opening usable during an emergency, not merely visible from the room. Current requirements should be verified for the specific property and permit. Common review points include:
- The minimum net clear opening provided when the window is fully open.
- The minimum clear opening height and width.
- The maximum permitted height from the finished floor to the bottom of the clear opening.
- The minimum horizontal area and clear dimensions of the window well.
- Permanent steps or a ladder when the well depth exceeds the applicable threshold.
- A cover or grate that can be opened from inside without keys, tools, or special knowledge.
- Protection against unsafe guards, bars, landscaping, or stored items that obstruct escape.
- Tempering, fall protection, structural, or energy requirements that may apply to the chosen location.
A window can look large while still failing to provide enough usable opening because the sash, frame, hardware, and opening direction reduce the clear area. Product selection should therefore be based on verified clear-opening data, not glass size or rough-opening dimensions alone.
Choosing the Window and Well
Casement Egress Windows
Casement windows are frequently selected because the sash swings outward and can provide a comparatively large clear opening from a moderate rough opening. They also offer good ventilation. Hardware quality, hinge clearance, screen removal, and ease of operation should be considered, particularly for a bedroom used by children or older adults.
Sliding Egress Windows
A horizontal slider can suit a wider wall area, but only part of the total unit opens. The selected size must provide the required clear opening with one sash moved fully aside. Tracks should remain clean, and the window should be tested periodically so it does not become difficult to operate.
Window Well Materials and Shapes
Galvanized steel wells are practical and familiar. Composite and molded wells can provide a more finished appearance and may include textures, steps, or color options. The best choice depends on depth, soil conditions, exposure, appearance, and the need for durable attachment to the foundation. The well must be large enough to avoid restricting the open sash or the occupant’s movement.
Covers, Grates, and Security
A properly selected cover can reduce leaves, small debris, and accidental entry into the well. Clear covers may also reduce direct precipitation while preserving light. Any cover used at an emergency opening should release easily from below and should not require a key or tool. Security concerns should be addressed with hardware specifically intended for egress use rather than improvised locks.
Drainage and Waterproofing: The Most Important Hidden Work
Water management is often the difference between an egress window that becomes a reliable part of the home and one that creates recurring concern. The window sits below grade, where roof runoff, melting snow, saturated soil, and surface drainage can collect. The project should manage water at several levels rather than relying on sealant around the frame.
Surface Water Control
The surrounding grade should slope away from the house where practical. Downspouts should discharge away from the well, and low spots that direct water toward the opening should be corrected. A well cover can help, but large volumes of runoff should never be aimed at the cover or well.
Drainage at the Bottom of the Well
Clean stone provides a drainage layer and helps keep soil from splashing against the window. Where an approved drain connection is available, the well drain may be tied into the foundation drainage system. In other conditions, an alternate engineered or code-accepted approach may be needed. A shallow layer of decorative stone without a functioning discharge path should not be mistaken for a complete drainage solution.
Waterproofing the Cut Opening
The exposed foundation edges, window perimeter, attachment points, and well connection must be protected with compatible waterproofing and flashing methods. Interior caulk alone cannot correct an exterior drainage or waterproofing deficiency. The goal is to shed and manage water before it reaches the interior side of the assembly.
Michigan Freeze-Thaw Conditions
Seasonal freezing, thawing, snow accumulation, and spring saturation place stress on below-grade assemblies. Stable well attachment, appropriate backfill, intact waterproofing, and clear drainage help the installation handle those cycles. Homeowners should remove compacted leaves and check the well after severe storms or rapid snowmelt.
How Long Does Installation Take?
Many straightforward installations can be completed over one to three working days, but the actual schedule depends on the foundation, access, excavation, weather, drainage, inspections, and interior finishing. A project involving a difficult block wall, deep excavation, extensive landscaping restoration, or a new drainage connection may require more time.
A realistic schedule should distinguish between the structural installation and the final cosmetic finish. The window may be weather-tight before drywall, trim, paint, flooring repair, or exterior planting restoration is complete. Homeowners should ask which items are included so there is no confusion about the finish level at turnover.
Typical Egress Window Installation Costs
A standard residential egress window project in the Lapeer area often falls in a broad planning range of approximately $4,500 to $9,500. Simpler conditions may cost less, while deep wells, difficult access, structural complications, premium window systems, major drainage work, or extensive interior and exterior restoration can push the project higher. A site-specific written proposal is the only dependable way to establish price.
Primary Cost Factors
- Foundation type, thickness, condition, and reinforcement needs.
- Depth and volume of excavation.
- Access for equipment and soil removal.
- Window size, material, glass package, and operating style.
- Well size, material, steps, ladder, grate, or cover.
- Drainage connection and waterproofing requirements.
- Permit, plan, and inspection requirements.
- Interior framing, insulation, drywall, trim, and painting.
- Exterior grading, lawn repair, hardscape, or landscaping restoration.
Where Homeowners Should Not Cut Corners
The lowest proposal is not always the least expensive project. Drainage, waterproofing, proper window sizing, controlled foundation cutting, and permit compliance are difficult to correct after the well has been backfilled and the basement wall has been finished. Cost savings are safer when they come from choosing a practical well finish, coordinating interior painting separately, or scheduling landscaping restoration independently—not from omitting essential water management or structural work.
Common Installation Mistakes
Selecting a Window by Nominal Size
The advertised size does not confirm the usable opening. Clear-opening specifications should be verified for the exact model and operating configuration.
Treating Gravel as the Entire Drainage Plan
Stone can hold temporary water, but it does not guarantee that water can leave the well during sustained rain or saturated ground conditions.
Directing Downspouts Toward the Well
Roof runoff can overwhelm even a well-built assembly. Downspouts and grading should move water away from the opening.
Installing the Window Too Late in the Remodel
Cutting after drywall, flooring, or custom trim is complete creates avoidable demolition, dust, patching, and layout compromises.
Ignoring Furniture and Exterior Obstructions
The opening must remain reachable and usable. Interior storage, deep window treatments, shrubs, fences, and locked covers can interfere with emergency use.
Assuming Every Basement Room Becomes a Legal Bedroom
Egress is one requirement among several. Ceiling height, smoke alarms, heating, ventilation, electrical safety, room dimensions, and local rules may also apply.
Maintenance After Installation
Egress windows should be included in routine home maintenance. A few simple checks help preserve operation and water protection:
- Open and close the sash several times each season.
- Clean tracks, hinges, locks, and weatherstripping.
- Remove leaves, soil, trash, and insects from the well.
- Confirm the drain area is not buried or clogged.
- Inspect the cover for cracks and verify it releases from inside.
- Watch for new sealant gaps, corrosion, staining, or dampness.
- Keep downspouts extended and maintain positive grading.
- Remove snow accumulation that could block operation or escape.
Any recurring water accumulation, difficult operation, foundation movement, or interior moisture should be investigated promptly. Early correction is usually simpler than waiting until finishes are damaged.
What Homeowners Can Expect from Lapeer Egress Windows
The best installation experience is organized, transparent, and specific to the property. Lapeer Egress Windows approaches each project by connecting the homeowner’s goal with the physical conditions of the house. That means discussing room use, reviewing the proposed location, explaining the window and well options, identifying drainage concerns, and defining the finish scope before work begins.
Homeowners should receive clear expectations about access, excavation, dust control, inspection timing, cleanup, and the portions of the basement or yard that may need restoration. A premium result is not based on speed alone. It is based on accurate planning, controlled cutting, dependable sealing, practical drainage, code-conscious sizing, and a final opening that the household can operate confidently.
Frequently Asked Questions
Do I need an egress window for every basement room?
Not necessarily. Requirements usually depend on the room’s use and the applicable code. Basement sleeping rooms commonly require an emergency escape and rescue opening, while other rooms may not. The project should be reviewed with the local permitting authority.
Can an existing small basement window be enlarged?
Often, yes. The feasibility depends on its location, the foundation material, the required rough opening, utilities, and exterior conditions. Enlarging an existing opening can sometimes reduce interior disruption, but it still requires excavation and foundation cutting.
Will the installation weaken my foundation?
A properly planned and executed opening should preserve the surrounding wall’s integrity. The installer must use an appropriate cutting method and address framing or reinforcement needs for the specific foundation. Existing structural concerns should be evaluated before cutting.
How do I know whether the window meets egress requirements?
Use the manufacturer’s verified net clear-opening dimensions for the exact window model and compare them with current local requirements. Rough-opening size, glass area, or overall frame size is not the same as usable clear opening.
Can the well drain into my sump system?
Sometimes, but the correct method depends on the home’s footing drains, sump configuration, local rules, and site conditions. A drain should not be connected casually without confirming that the system can receive and discharge the water properly.
Do egress windows leak more than other windows?
They should not leak when the opening is correctly flashed, sealed, waterproofed, drained, and graded. Because they are below grade, poor water management around the well can expose them to more water than an above-grade window.
Can I install a locked security cover?
Security must not prevent emergency escape. Covers and security devices at required egress openings should be operable from inside without keys, tools, or special knowledge. Use products designed for egress applications.
What happens to the excavated soil?
Some soil may be reused for backfill and final grading if it is suitable. Excess or unsuitable material may need to be removed. The proposal should explain soil handling and whether final landscaping restoration is included.
Can installation be done during winter?
Some projects can be completed in colder weather, but frozen soil, snow, exterior sealant limitations, and difficult access can affect scheduling and methods. Weather conditions should be evaluated rather than assuming every winter day is suitable.
Does the window come with a warranty?
Warranty coverage can involve both the manufacturer’s product warranty and the contractor’s workmanship warranty. Homeowners should receive the terms in writing and understand what is covered, for how long, and what maintenance is required.
Plan Your Egress Window Before the Basement Work Begins
A successful egress window starts with the right location, correct opening, dependable drainage, and a clear understanding of the finish work. Schedule an on-site evaluation with Lapeer Egress Windows to review your basement, foundation, yard access, and project goals. You will receive practical guidance on window sizing, well options, water management, permitting considerations, estimated timeline, and the work required to complete the installation properly.
Plan Your Egress Window Project
Tell us about your property and the work you are considering. We will follow up to discuss practical options for your Lapeer, MI project.